ConnectABILITY Homepage

What is Person-Directed Planning?

photo of a person directed plan

Person-directed planning helps you think about the life you want and your future.

With the help of a facilitator, it is a process which:

  • Is directed by you
  • Supports you to make a plan for the best possible quality of life where you live, work and spend time
  • Identifies and strengthens your personal support network
  • Supports you to be involved in your community
  • Helps you develop goals and determine who will help you reach your goals
  • Identifies all informal and formal supports and services needed
  • creates a living document that should be reviewed at least once per year and changed as required.

Person-Directed Planning:

  • is a service to help you create meaningful life goals and find community connections with the help of important people in your life.
  • is not case management or a referral service. If you do not want to spend time planning goals for the future, but only want help finding a service, planning may not be right for you at this time.

How can person-directed planning help me?

Planning can help direct your life the way you want. Planning can help you figure out how to share your strengths and talents, and how to find new opportunities. It’s good to be clear about what you want to do, how to do it, and the support you need to create the future you want.

Person-directed planning assists a person with developmental disabilities to create a meaningful life in their community by identifying their life goals and finding community connections, services and/or supports with the help of their families and/or significant others of their choice.

For example:

  • Identifying abilities and interests
  • Finding volunteer, employment and/ or educational opportunities
  • Enhancing independence skills
  • Making connections to social and recreational activities

The focus of planning is based on the goals people set.

Is this the right time to work on a Person-Directed Plan (PDP)?

  • Planning: Am I interested in planning for my future? For example: planning for life after high school graduation, moving somewhere different, or trying something new.
  • Goals: Am I ready to develop goals to create a meaningful life in my community? For example: meeting new people, learning a new skill, and or finding a job.
  • People: Am I interested in including people in my life or developing a network of people to help me plan for my future? For example: family, partner, friends, neighbours, or teachers.
  • Timing: Can I spend some time visioning, dreaming, and planning for the future or am I in urgent need of help? For example: stable housing or health

Other useful information about Person-Directed Planning:

  • A. For adults (18 years of age and older) access to person-directed planning is through your local DSO http://www.dsontario.ca/ (For example: For Toronto Developmental Services Ontario Toronto Region (DSOTR) Phone: 1-855-DS-ADULT or 1-855-372-3858 Tty: 416-925-0295 Fax: 416-925-3402 Email: DSOTR@surreyplace.on.ca http://www.dsotoronto.ca/
  • B. For children and youth up to age 18 person-directed planning is available (usually without cost). (For example, in Toronto: Toronto Community Living Toronto 647- 426-3220. For youth between 14-18 years of age: Corbrook 416-245-5565 ext. 222)
  • C. Passport funding can be used to pay for person directed planning.
  • D. You can choose a Plan without implementation or a Plan with implementation
    1. A Plan without implementation does not include staff support to implement goals. Informal supports, such as family members, community members, etc., can be used to help facilitate goals.
    2. A Plan with implementation includes a worker for up to one year to help facilitate goals.
  • E. You can have an Independent Facilitator (not associated with a service provider agency) to help develop your plan (The Ontario Independent Facilitation Network) or you can choose a Ministry funded agency to help you develop your plan (Check with your local DSO to find agencies). Whichever you choose to there should be no difference in the quality of the plan.

How can I prepare for my plan?

To get ready for a plan, think about whom you want to invite and what goals and dreams you want to talk about.

What different ways is planning done?

There are many tools planners use. All are flexible based on what you like and how you communicate. The tools are not just another way to create a service plan, but are a different way of thinking about how to do what you want and reach your goals. Often your planning facilitator will meet with you before your planning meeting to talk about the tools and find what works best for you.

How often do I meet with my group to go over my plan?

In the beginning you may meet more often, but the number of meetings depends on the progress towards your goals and how often you want to meet. There may also be meetings with just your planning facilitator in addition to meetings with your group.

What is a network?

A network is a group of people who meet regularly to help you to reach your goals or personal vision. Usually, friends, family members, co-workers, neighbours, and sometimes service providers are part of a network. Most of the people in a network are not paid; they are there because they care about you and have agreed to work together to support you in making your life better.

How can a network help me carry out my plan?

  • Support you with what you want to say
  • Bring ideas and help in planning for the future you want
  • Help you make decisions
  • Use their personal networks to make connections in your community
  • Give support
  • Spend time with you
  • Advocate on your behalf
  • Provide friendship
  • Celebrate together

How can I get help to build a network over the long-term?

Networks can happen at any stage in a person’s life but often form during periods of change or transition, such as starting high school, leaving school, moving out of the family home or looking for work.

A planning facilitator can help you to create a network. As you become more involved in your community working on your goals, you may meet people who might become part of your network.

Life Beyond Work

boy painting at easel

High school is more than just about attending classes. It is also about exploring your interests, developing skills, establishing social relationships (independent of your family circle) and having fun! Activities and experiences at this time can help us figure out what we would like to do after high school and, they teach us to balance what we like to do and what we must do, in our daily lives.

You would typically do this through recreational, camps and volunteer activities. Some of these will occur during the school day; others will happen outside of school.

Inside school:

Check out the extra-curricular activities offered in the school. Intramural sports activities, use of fitness equipment, clubs (such as drama, chess, or photography), choirs, bands, yearbook and newspaper committees, all offer opportunities to pursue interests and make friends. What activities are you interested in? What will fit into your schedule? Are you interested in competing or just having fun? Once you answer these questions, plan to attend a session or two to see if it is what you had in mind. Remember: high schools often offer activities that will be new to you. (i.e.: football) Intramural clubs are great places to learn and the coaches expect to do some teaching and mentoring. That is how they build their teams/clubs for future years. Some schools offer peer- mentors, if you need extra support. Speak to your Guidance Counsellor for advice.

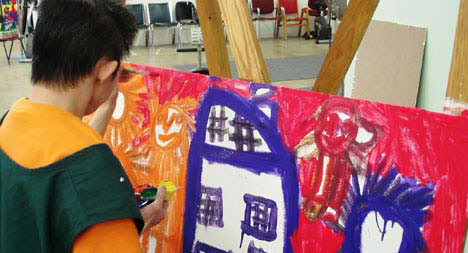
Many school departments use volunteers. For example: the library may use student helpers to re-shelve books, teachers use students as “office assistants” on parent nights, the drama club uses volunteers to help paint sets and there is often, a “stage crew”, to set up the stage for assemblies. Talk to teachers about opportunities or visit your Guidance Counsellor. Some activities will be ongoing while others are a one-time event.

Paid work in schools is limited but, the cafeteria, office or gym coach might offer positions.

Outside of school:

Recreation:

Community and recreation centres offer a wide variety of activities. You can find everything from swimming lessons to woodworking classes. They usually produce a calendar of events organized around the school year and offer activities based on age/experience. Check schedules to determine when the activities you are interested in are offered. Take note of registration dates and fee schedules. Many offer reduced fees for families on tight budgets. Municipal departments such as Parks and Recreation will have information but often, walking to the centre and asking staff, is the easiest way to check out activities available locally.

Boards of Education often offer interest courses such as dance, crafts, cooking and mechanics. These are usually offered at night time. Calendars are often organized around the school year. Fee schedules are published.

Public libraries often offer workshops, movie nights or lectures. Check out the website or visit your local library. They will have their calendars and often, those for other local libraries.

Many cities will have bulletin boards or websites announcing events around the city such as winter festivals, theatre in the park, neighbourhood festivals and public meetings. On the internet, searching for events + your city will often give you a list of what’s happening in your area.

Locally, you should look for private organizations. Religious institutions might have youth groups, choirs or study groups. Cultural groups may have language or dance classes and community gatherings. Theatre groups will post a play schedule. Sports clubs, private dance, yoga classes, fitness clubs and pottery centres are just a few of the activities found in the private sector. Your local newspaper or telephone directory will provide contact information and many now will have a website.

Camps

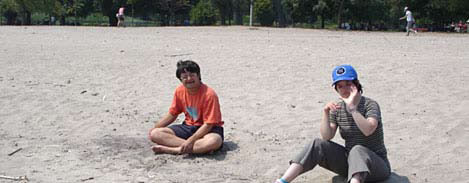
Do not overlook the offerings of camp programs in the 21st century! Summer camp, March break and even December camps can offer exposure to new skills or enrichment of current talents! Traditional camps offer a mixed experience of boating, swimming, arts and crafts and survival skills but there are so many more options! Computer camp, sports camp, dance camp, circus camp, sailing camp, digital photography camp are just a few of the choices to be found. Many of these camps are designed for the young teen set (under age 16) and many also offer opportunities for Counsellors-in- Training, for those looking for leadership experience. Whether you wish to be a camper or a leader, opportunities are out there! Determine your budget, your desire for residential or day camp, and your interests and get searching! On the internet summer camp+your province, will get you started. All camps offer opportunities for lasting friendships and great memories.

two people sitting on a beach

Volunteering

Volunteer involvement strengthens communities and is mutually beneficial to the volunteer, the organization they support and the community. The volunteer develops skills and contributes to the community. Volunteers improve the capacity of the organization to realize its mission. When you volunteer, you should choose your activity carefully! Are you wishing to learn something? Gain experience for your resume? Share a talent you have? Have fun? You will be asked to make a commitment. The organization will allocate resources to train and support you.

To find a volunteer position, consider charities and non-profit organizations local to you. Organizations like hospitals, service clubs and museums are good places to start. If you do not know of any, try to find your local volunteer centre. On the internet, a search for volunteer + your city often gets you a list. They will have information of current positions.

These are just some ways that you can start to develop a balanced life. This helps you to build connections and relationships, as well as varied skills and abilities through different activities.

Joining in Play

photo of children running in playground

Some children find it easy to join a group of children. When they see another child, or a group of children playing something that looks like fun, they either just sit down and join in, or ask simple questions such as, “What are you doing?”, or “Can I play?”.

For some children, joining in a game can be very challenging. These children might play alone or use inappropriate methods of joining in, such as grabbing toys, or hitting other children in order to get their attention. None of these strategies are appropriate. The child who grabs or hits will probably be seen as a “trouble maker” and is unlikely to be welcomed into the play group. A child who does not join in, but stands alone on the sidelines might be feeling very lonely or shy. They also are not learning all the important skills that group play can teach.

Like other social skills, the skill of “joining in play” is one that some children can be taught – step by step.

Helping your Child Learn How to Join in Play

As a parent, teacher or early childhood professional, you can help your child learn how to join in play using the following ideas.

    1. Talk about it
      Start by talking to your child or children about the specific skill. Ask her questions like:

      “How can you ask a friend to play? Show me.”em>
      “How does it feel when you play with someone else?”

    2. Teach
      You can teach your child about the appropriate ways to join in play. One tool you can use is a personal story.

      The goal of a personal story is to:

      • describe social situations that are difficult for your child,
      • increase his understanding of this situation,
      • provide suggestions about how to behave, and
      • give your child some perspective or understanding on the thoughts, emotions, and behaviours of others.

      It is best to use a personal story when your child is calm and focused, not when the challenging situation is actually happening. Try reading and talking about the story daily (perhaps at the beginning of the day) so that your child is able to really understand.

joining a game script

  1. Role-Playing
    Role-playing consists of acting out various social interactions that children would typically encounter. Puppets or other toys can also be used as “actors” in the role-play.

    Role playing teaches children the actual words they can say and the things they can do in specific situations. It also gives children an opportunity to practice these new skills with their peers.

    In the beginning, you should play all the ‘parts’ to show your child what she can do or say in certain situations. You can keep her interested by using characters from her favourite television shows. Be sure to speak in an animated voice and use words that your child can understand.

    Try to act out situations with both positive and negative responses, as this will help your child understand that other children are not always willing to share or play with her.

    Here are some examples:

    Scenario 1

    Dora and Boots are playing with blocks. Swiper comes close, taps Dora on the shoulder, makes eye contact, and says, “Can I play with you?”

    Dora says, “Sure”. Swiper says, “Thanks” and joins the game.

    Scenario 2

    Dora and Boots are playing with blocks. Swiper comes close, taps Dora on the shoulder, makes eye contact, and says, “Can I play with you?”

    Dora says, “No”. Swiper says, “OK” and goes to find someone else to play with.

    Steps to take when using role-playing to teach children to join in play:

    • Step 1 – Model the skill
      Two or more adults model a situation in which one asks the other to join him/her in play. The specific phrases and behaviours that your child needs to learn are modelled.

      Role-play a few possible scenarios so that children are prepared for different situations:

      Scenario 1

      Person A and Person B are playing with blocks. C comes close, taps A on the shoulder, makes eye contact, and says, “Can I play with you?”

      A says, “Sure”. C says, “Thanks” and joins the game.

      Scenario 2

      Person A and Person B are playing with blocks. C comes close, taps A on the shoulder, makes eye contact, and says, “Can I play with you?”

      A says, “No”. C says, “OK” and goes to find someone else to play with.

    • Step 2 – Select role players
      At first, it is best to have older children or ones who are more experienced at the skill do the role-play and have your child watch and comment.
      If possible, give all interested children a turn to do the role-play. It is especially important that your child who is learning the skill has a turn to be part of the role-play.
    • Step 3 – Children do the role-play
      A small group does the role-play and the other children watch and comment.

      After seeing a few examples, your child can be part of the role-play. She should play many different parts in the role-play.

      Encourage the children to role-play different scenarios and outcomes (e.g., when someone says, “No, you can’t play with us.”)

    • Step 4 – Provide feedback
      Everyone can give feedback to the role-players. Remember, you are modeling how to give positive feedback. Give specific, positive feedback to all children involved in the role-play. For example, “I liked how Joshua asked Amelie if he could use some of her crayons.”
  2. Reinforce
    Tell your child that you will be watching for this skill for a week. Reinforce your child when you see her joining in play and remember to label the behaviour that you want to see.

    “Bernice, good job using words to ask to play with Christopher”.

  3. Review
    Talk about the skill for a few minutes each day so that it is fresh in your child’s mind. This also helps her understand the importance of this social skill.

    Teaching your child how to join in play can be challenging and takes time. You will be most successful when you are:

    PATIENT – Some children might need more reminders, more support, and more time to learn.

    CONSISTENT – Make sure that you and any other adults in your child’s life have the same expectations of the child.

    POSITIVE – Remember to look for your child using the skill and reinforce her as much as possible.

    By using these strategies and encouraging your child, she will become more comfortable joining in play with other children.

    Source:
    Personal stories are based on “Social Stories” created by Carol Gray.

How to Apply for a Social Insurance Card (SIN)

Why do I need a Social Insurance Card?

  • When you’re ready to enter the workforce you will need to apply for a Social Insurance Card.
  • No employer will hire you if you do not have a Social Insurance card.

How to apply for your Social Insurance Card for the first time?

  • You can apply in person or by mail
  • If you have access to a computer and the internet you can download the application form from: www.hrdc.gc.ca or you can pick up your application from your local Service Canada Centre
  • It is recommended that you apply in person at your local Service Canada Centre

What documents do I need?

ALL DOCUMENTS MUST BE THE ORIGINAL
You need a primary document from one of the following that describes your status in Canada:

Canadian citizen born in Canada:

  • Certificate of Birth or Birth Certificate (issued in Canada)

Canadian citizen born outside Canada:

  • Certificate of Canadian Citizenship (issued by Citizenship and Immigration Canada)

Status Indian Born in Canada:

  • Certificate of Birth or Birth Certificate

Status Indian born outside Canada:

  • Certificate of Birth or Birth Certificate and a Certificate of Indian Status

Permanent Resident:

  • Permanent Resident Card (issued by Citizenship and Immigration)
  • Confirmation of Permanent Residence and Visa counterfoil in foreign passport (issued by Citizenship and
    Immigration)
  • Confirmation of Permanent Residence and Visa countfoil on United Nations High Commissioner for Refugees
    Travel Document (issued by Citizenship and Immigration)
  • Confirmation of Permanent Residence and Visa countfoil on Single Journey Document for Resettlement in
    Canada (issued by Citizenship and Immigration)
  • Confirmation of permanent Residence and visa counterfoil on Red Cross Travel Document (issued by
    Citizenship and Immigration)
  • Record of Landing (issued by Citizenship and Immigration)

For Children under the age of 12 the parent or legal guardian must also provide proof of identity

You may also have to provide a supporting document if your name appears different from your primary
document.

The following supporting documents may be submitted:

  • Marriage certificate or marriage registration
  • Divorce Decree
  • Legal change of name document
  • Adoption papers
  • Request to amend immigration record of landing or confirmation of permanent residence

ALL DOCUMENTS MUST BE THE ORIGINAL

How much do I have to pay for a Social Insurance Card?

  • If you’re applying for the first time your Social Insurance Card there is no charge
  • If you have lost your Social Insurance Card and you need to replace it you must pay $10.00

Where do I mail my application to?

Service Canada
Social Insurance Registration Office
PO Box 7000
Bathurst NB E2A 4T1

Where is my local Service Canada Centre?

Local office Information:
City Hall – Service Canada Centre
100 Queen Street West
Toronto, Ontario
M5H2N2

Cecil Street Community Centre Scheduled Outreach Site
58 Cecil Street
Toronto, Ontario
M5T1N6

Metro Hall Scheduled Outreach Site
55 John Street (King Street Entrance)
Toronto, Ontario
M5V3C6

College Street – Service Canada Centre
559 College Street
Toronto, Ontario
M6G1A9

Gerrard Square – Service Canada Centre
1000 Gerrard Street East
Toronto, Ontario
M4M3G6

Centre – Service Canada Centre
25 St Clair Avenue East
Toronto, Ontario
M4T3A4

Flemingdon Park (Flemingdon Recreation Centre) Scheduled Outreach Site
29 St Dennis Drive
Toronto, Ontario
M3C3J3

Rogers Road Scheduled Outreach Site
605 Rogers Road
Toronto, Ontario
M6M1B9

Lawrence Square – Service Canada Centre
700 Lawrence Avenue West
North York, Ontario
M6A3B4

Etobicoke South Social Services Scheduled Outreach Site
779 The Queensway
Toronto, Ontario
M8Z1N4

Helping Someone to Make Transitions

For someone with an intellectual disability, any kind of transition or change can be extremely stressful. People with intellectual disabilities can feel vulnerable when faced with a new situation because it will take them out of the familiar. The familiar represents a successful safe haven of sorts to most of us. When we are faced with a significant (or, for some of us) a slight change, we begin to prepare ourselves in a variety of ways.

This article will outline a number of strategies that can be used to assist any individual with making a transition. These strategies are divided into three main sections:

  1. preparation
  2. making the transition
  3. follow-through

When any type of change is anticipated we prepare ourselves in a variety of ways. For a job interview in an unknown location: we can rehearse possible responses to questions with a friend; we can look on a city map to find the location; we can decide ahead what clothes to wear, etc. Each of these preparatory steps help us to be more organized and, hopefully, more confident when we actually have our job interview.

Preparing an individual with an intellectual disability for change will certainly be a smoother process if preparatory steps are followed. The use of a variety of cues and aids generally assists in making transitions, whether large or small.

Consider the cues that might be used for a young adult about to leave home for an assisted living arrangement. Visual cues can include things like: brochures with photographs of the interior; polaroid photos taken by the individual and her family on a visit; calendars and schedules outlining daily or weekly routines; picture symbols to help organize clothing and possessions; name tags on fellow residents’ photos. Auditory cues can include the rehearsal of peoples’ names; practicing at home with an alarm clock to wake up independently; practicing with an egg timer to get dressed independently. The individual can also prepare with family by packing their own belongings; physically taking the transit route to get to the new residence; and taking part in some social activities at the residence prior to moving in. All of these cues are, in some way, assisting the individual to prepare, to be more comfortable when the moving day finally does come.

Essentially, preparing for change is the taking of any steps which will make the transition go as smoothly and successfully as possible.

We have discussed a rather large and potentially stressful change in a person’s life. However, many of these same types of cues may be used with a small transition. Some individuals may be so disrupted and upset by even a small change in their environment that they will need some kind of preparation. An individual who is comfortable with a predictable daily routine may need preparation to change a part of that routine.

For example, a child in a nursery program may need to move from one activity to another. Each time a new move or transition occurs, a number of cues can be used to help. The child may be given verbal warning paired with a visual cue that he will be moving to a new activity. Other children could be partnered with him to give another cue-when they move, he sees this and moves too. A portable schedule can be given to the child, using picture symbols to show what comes next. All of these ways of preparing an individual may help the transition to be successful.

During the actual transition, it is useful to repeat the various cues, including visual, auditory and physical. Now the cues are given in an immediate way, with the intent that the transition will happen. For the child moving from one activity to another at Nursery School, the instruction can be given, paired with physical guidance to help the individual complete the action. For the adult moving to a group home, the actual day will involve the carrying of favourite articles to a vehicle and physically getting into a vehicle to travel to the apartment. Again, the repetition of various cues will help the person to be more independent, comfortable and successful.

The final stage in making transitions involves the assessment of how the transition was made. Was the individual successful? Could some things be changed in preparation so that the transition goes more smoothly? Did the individual appear to respond better to some Cues than others? By asking these and other related questions, subsequent transitions can be made smoother for the individual. When the individual and others around him/her are asked how things went, a better picture will emerge on how to modify transitions in the future. This step is important because, ultimately, changes in routines and activities should become easier to deal with.

The ease with which we handle new and different situations is directly related to how many times we encounter new and different situations. The more we are successful with changes in our environment, the more relaxed we can be when faced with something completely new. We learn to generalize from one situation to another. Generalization occurs when we mentally assess a new situation and compare it to similar past experiences. We see the aspects that are the same, and we see those that are different. We use all of our past experiences to successfully manage this one.

When assisting an individual with an intellectual disability to make successful transitions, we need to build in opportunities for generalization to occur. Frequently, this will mean more practicing of skills across a number of different situations, and with a variety of people. Cues may be altered slightly, instructions may be changed, timing may be different. All of these should be planned based upon the observations made when the individual first made their transition.

Let’s review the three stages in making a successful transition. First, we must carefully prepare the individual for change by using as many cues as possible to let them know change is imminent. Second, we must use those cues again when actually making the transition. The more cues that facilitate independence with the transition, fostering self reliance, the better. Third, a review of what happened is critical to ensure that future transitions will be successful. It is especially important to look at the need for generalization at this stage, building up the experiences in a positive way, sot that change does not seem as difficult.

The First Job and Beyond

photo of girl working in video shop

Gaining work experience is a great way for someone to explore occupations that might interest them in the future. (Working is also a great way for someone to figure out what they DO NOT want to do!)

For people just beginning to think about life after school, after school or weekend jobs are the most likely place they will start. They might be limited in their choices by the opportunities available, but remember, even if a job does not sound like exactly what a person wants to do, it might be useful in learning some skills that will give them more qualifications in the future.

Resume:

To begin, a person should have a resume to give to employers. A school guidance counsellor should be able to help them with this. If the person is not in school, there are many community resources that can help. Start by checking on the internet or at your local library for advice.

In every resume it is important to include all their work experience. They may not have had a “regular job” before but things like grass cutting, snow shoveling, dog walking and errands for neighbours will demonstrate that they can work independently and are motivated! Don’t forget to include the skills gained through extra-curricular activities. That talent and an employer’s need just might overlap!

Remember to always update their resume when their contact information changes, as well as each time they start (or finish) a new job.

Consider qualifications they could get to increase their chances such as baby sitting certificates, first aid training, or swimming medallions. They will want to include any awards or proof of their skills on their resume.

The Job Search

When looking for a job, there are several places that will have postings. Checking the classified section of a local newspaper for listings (or even contacting the paper about obtaining a paper route) could help someone on the way to obtaining a job. Checking bulletin boards at local recreation centres, supermarkets and libraries could lead to cleaning, baby sitting, lawn care, or other employment opportunities close to home.

Government employment centres will have job postings too. In Canada, HRSDC even offers access to their job bank online. (See: https://www.jobbank.gc.ca/home. The internet offers a lot of other opportunities to find work. Consider checking websites of government departments such as Parks and Recreation or a local municipality website. Both the Government of Canada and Ontario websites have a job opportunities section and even have a “youth jobs” category. Take a look for websites of local businesses as well as Chambers of Commerce. They might post opportunities, usually listed under categories such as “job opportunities” or “human resources”.

If a person is enjoying their current volunteer or co-op placement, check with the people who set up the placement to learn about opportunities there. Sometimes employers are more than happy to begin paying people for their work. Employers do expect to get a return for their money, and working comes with the expectation of independence on the job, as well as the higher level of responsibilities common to all paid employees that might not be expected in co-op and volunteer placements.

Sometimes finding a new employment opportunity is as simple as taking a walk. Look for “Position Available”, “Help Wanted” or “Now Hiring” signs, posted at local businesses. If a person is interested in working for a specific company, they can often pick up an application at the Customer Service desk (take two if you can, just in case you make a mistake!). Even if the company does not have a position at the moment, many stores keep applications on file for a while.

Finally, never be afraid to network. Ask everyone you know (friends, family members, teachers, support staff, co-workers) about what they do for a living, and if there are opportunities available in their workplace. Sometimes jobs aren’t obvious, but every work place has needs to be filled. Let people know that you are looking to develop an employment opportunity and ask them to keep you in mind the next time they go to work.

As you can see, job opportunities are readily available however it is also important to remember that a person’s first job is likely not where they will spend the rest of their lives. The experiences and skills they learn will carry over into future job opportunities. Being flexible early on may lead to the ideal job down the road, so keep an open mind when trying to obtain employment.

Exploring Funding Sources

boy holding a cheque

Where do you find individual funding sources to assist someone who wants to access work, volunteer and recreational opportunities; yet additional support is needed?

Funding sources may mean money to pay for personal supports, skills training or assistive devices so the person is able to choose those opportunities. Typically, such sources come from local or provincial funding. It is beneficial to contact your provincial Ministry of Children, Community and Social Services or local developmental service agencies in your area to explore what’s available.

Potential provincial funding sources in Ontario include:

Income Supports

Through the Ontario Disability Support Program, the Ministry of Children, Community and Social Services provides financial assistance and other benefits to eligible people with disabilities and their families. This can include “Income Supports” for accommodation and basic living expenses as well as prescription drugs and basic dental care.

www.mcss.gov.on.ca/en/mcss/programs/social/odsp/income_support/apply_income.aspx

Employment Supports

Through the Ontario Disability Support Program, the Ministry of Children, Community and Social Services also provides goods and services to eligible people with disabilities to help overcome barriers to employment.

“Employment Supports” are designed to help people with disabilities alleviate some of the challenges they face in finding or keeping a job.

www.mcss.gov.on.ca/en/mcss/programs/social/odsp/employment_support/what.aspx

Special Services At Home (SSAH)

The Special Services at Home program provides funding directly to families so they can purchase services to provide personal development and relief support to children with a developmental disability and children with a physical disability. With this funding, families can purchase supports and services which they could not normally provide themselves and are not available elsewhere in the community.

This program is funded and administered by the Ministry of Children, Community and Social Services.

www.children.gov.on.ca/htdocs/English/topics/specialneeds/specialservices/index.aspx

Passport Initiative (Passport funding)

The Ontario government created the Passport initiative to provide opportunities for individuals who have a developmental disability and who have left school to find more ways to participate in their communities. Through Passport, participants can receive funding for activities that encourage their personal development and help them achieve their potential.

www.mcss.gov.on.ca/en/mcss/programs/developmental/servicesupport/passport.aspx
Update: Revised Passport Guidelines (September 2021)

Assistive Devices Program (ADP)

The objective of the Assistive Devices Program (ADP) is to provide consumer-centered support and funding to Ontario residents who have longterm physical disabilities and to provide access to personalized assistive devices appropriate for the individual’s basic needs.

www.health.gov.on.ca/english/public/program/adp/adp_mn.html

Respite Services (respiteservices.com)

respiteservices.com consists of agencies funded by the Ministry of Children, Community and Social Services and the Ministry of Children, Community and Social Services. They are collaborating to develop a more dynamic respite network for both children and adults in Toronto. As well, participants include delegates from the Ministry of Children, Community and Social Services, the Toronto District School Board, Toronto Parks and Recreation, and the Children’s Aid Societies. Other organizations providing respite services for families in Toronto are invited to join.

www.respiteservices.com

To find alternative funding sources in your area, search through your local sports clubs, faith or cultural groups, recreational facilities, charitable organizations or community agencies. For example:

Local Rotary clubs fund programs which benefit children and youth in the areas of health, education, child abuse and neglect, social development and life enrichment. It also funds community programs for the homeless, disabled and seniors and contributes, from time to time, to international Rotary projects which assist children and youth.

www.rotary.org

Check the Yellow Pages for Charitable Organizations for your local area.

www.yellowpages.ca

Check the Canadian Association for Community Living (CACL) for your local support agency.

CACL is a Canada-wide association of family members and others working for the benefit of persons of all ages who have an intellectual disability.

www.cacl.ca/

Creating Employment and Training Opportunities in Your Community

photo of girl working in an animal shelter

The term ‘community’ refers to the people and places that surround you. As you may already know, some people with intellectual disabilities find themselves requiring assistance getting involved in new things, be it through parents, family members, or support workers. Whatever your role, for providers of support it can be challenging to connect with new people.

There is no right or wrong way to approach employers and other community members. Every situation is different. Here are some general tips that might help you in your quest to network within your community.

  1. Always give a specific date for a meeting. If the person you are speaking with seems interested, make sure you establish a set time and date to begin, and stick to this agreement.
  2. Always ensure whomever you meet with that you will not take up much time. 15 minutes should be enough.
  3. In many ways this is a sales call. Don’t be unprepared! Go in with a list of reasons how THEY will benefit. If you are only representing one person, give specific examples of the person’s strengths as they relate to the community setting.
  4. Be yourself.
  5. Always leave with a good first impression. If the people you approach are not interested, be ready to move on and don’t take it personally.
  6. When possible, meeting in person works best.
  7. You are not alone, but be ready for a lot of disappointment. It might take 20 or 30 (or more!) calls before you find someone who is supportive of your ideas. Remember that YOU are doing the people you connect with a favour by connecting with them, even if they don’t see this right away.
  8. For work placements, don’t be afraid to negotiate for actual pay (minimum wage or higher). If the person is working for a business, there is no reason they shouldn’t be paid for their efforts. While training placements are a great way for people to learn new skills, the unpaid training period should be as short as possible, and the employer should always know that the goal of the placement is to eventually hire the individual. After all, it is illegal to have unpaid workers in a private company.
  9. Try to organize an open house. Have people in your community come to your home or office for lunch, and give them a chance to meet the person they could be working with.
  10. Don’t expect anything from the people you connect with. Go in ready to simply explain your situation, with no pressure, and hope that they are willing to do more than listen.
  11. Be confident and direct, but not pushy. Sometimes people have a change of heart later on. This will be less likely to happen if you create a bad first impression.

When deciding on what places you want to approach, keep in mind that the people who already surround you are the best people to begin speaking to. Check with family members, co-workers, teachers, other families, or friends to see what might be available. Networking is a key aspect to creating opportunities within the community. Even if the people you know are unable to help you, perhaps they know somebody else who can assist.

Choosing a Child Care Program

photo of playground

Choosing a program for your child is a very personal choice for each family. The best program is one that matches your child’s personality, likes and dislikes, health, interests, and behaviour. It is also important to think about finding child care that respects your family’s culture and beliefs. With so many child care options to choose from, look for a program that meets your family’s needs and schedule, provides a safe and fun environment for your child, and also helps her learn, grow and build relationships with others.

Decisions about child care are important. Let’s take a look at some of the following child care options:

  1. Nursery Programs
    Nursery programs are offered on a part-time basis for children usually three to four years old. Programs tend to operate in the morning and follow a ten or eleven month schedule each year. They may be closed for one, or two months during the summer. The programs may be offered for 2-5 days per week for a 2 ½ to 3 hour program. The parent is not expected to remain with the child. The program will provide a range of activities such as arts and crafts, sensory, free play, gross motor and group games such as music circles.

    Nursery programs offer other benefits including:

    • a focus on education
    • the social skills of young children
    • a preparation for elementary school or kindergarten
  2. Child Care Centres (Daycare)
    Child care centres (daycare) offer balanced programs of activities for infants (0 to 18 months), toddlers (18 months to 2.5 years), pre-school (2.5 to 5 years), and school-age (6 to 10 years) children. Children learn and grow while making friends with other children of the same age.

    Child care centres provide a program for a full day, usually offering at least 9 hours of care. Child care centres are open all year; some may close for a set two week period during the summer for vacation. Fees are based on in which age group your child belongs. Infant spaces are the most costly. Many child care centres offer before and after school care as well.

    Centre-based care offers other advantages:

    • the staff includes professionals with training in early childhood education
    • the activities are designed for children at different stages of development
    • the setting is designed for children
    • the toys and playground equipment are age-appropriate and are chosen with the safety and enjoyment of children in mind
  3. Home Child Care
    Home child care is provided in a family-like setting for infants, toddlers, pre-school, and school-age children. Children from the same family can be cared for together, often in their own neighbourhood, and close to school and friends. Hours of care can be flexible and may be adapted to suit the needs of individual families. Keep in mind that some home child care providers are licensed and some are not. Let’s take a look at some of the benefits of licensed home child care.

    Licensed home child care agencies are inspected at least once a year by the Ontario Ministry of Children, Community and Social Services. Agencies will recruit individual caregivers who use their homes to care for up to five children. These caregivers, usually called providers, are supervised by home visitors employed by the agency.

    Home visitors with training in child development and family studies ensure that providers follow the agencies’ approved policies and procedures and meet the requirements of the Day Nurseries Act.

    Home child care provided through licensed agencies has many advantages:

    • providers have access to learning opportunities and other supports through their association with home child care agencies
    • home visitors help providers to plan activities for children at different stages of development
    • home visitors provide advice about nutritious meal planning and routines
    • home visitors check the home environment to make sure that it is free from dangerous objects and materials
    • agencies often lend providers child-size furniture and may supply toys and equipment that have been chosen with the safety and enjoyment of children in mind

    Child care services offered by an independent caregiver are sometimes referred to as non-licensed home child care. This is another option for child care, but keep in mind that it is not regulated. All aspects of the services offered by independent caregivers such as hours of operation, fees, policies, and philosophy, are determined by the caregiver, or are negotiated or discussed individually with the parents. Non-licensed child care may be provided by relatives, friends, neighbours, or nannies.

  4. Specialized Child Care Programs
    There are a variety of specialized child care programs which provide full day, half day or nursery programs. Some specialized programs are segregated (available for only children with special needs) and others are integrated where children of all abilities are included.

    These programs have many benefits including:

    • some programs offer specialized services, such as physiotherapy, occupational therapy, and speech and language therapy
    • staff with specialized training to work with children with special needs
    • smaller group settings

How are child care programs regulated?

When thinking about child care options, keep in mind that in Ontario, all child care centres must be licensed by the Ministry of Children, Community and Social Services, under provincial legislation called the Day Nurseries Act.

The Act sets out very specific rules, regulations and minimum standards under which centres must operate in order to get and maintain a license. Most of the regulations of the Act are designed to ensure the health and safety for children. In addition, some regulations relate to helping children develop and learn.

The following is a list of how the Act outlines the ration or number of employees required to care for a certain number of children. These rules apply to all centre based care.

  • Infants (0 to 18 months): 1 employee for every 3 infants (1:3)
  • Toddlers (18 months to 2.5 years): 1 employee for every 5 toddlers
  • Pre-school (2.5 to 5 years): 1 employee for every 8 preschoolers
  • School-age (6 to 10 years): 1 employee for every 15 school age children

Home child care is also regulated under the Day Nurseries Act. Agencies that provide home child care services also have specific policies that home providers follow.

Assessing Your Family Needs

Part of choosing the best child care option for your child is to start by assessing your family needs.

Consider some of the following:

  • For how long do I need child care? (e.g., morning or afternoons only, full-day, before and after school)
  • When do I need the child care? (e.g., immediately, in a few months)
  • Where do I want the child care to be located? (e.g., near home, work, school)
  • How will I get my child to child care? (e.g., walking, bus ride, car)
  • For what type of care am I looking? (e.g., nursery program, child care centre, home child care, specialized program)
  • Will I require subsidy or financial assistance to pay for the fees?

Once you know your family’s needs, you can begin to explore the child care resources in your area. Information about child care centres, nursery programs, or agencies that have home child care providers in your community is available from:

  • the yellow pages of the telephone directory under Child Care or Day Care
  • newspaper ads, bulletin boards
  • local offices of the Ministry of Children, Community and Social Services
  • community information centres, child care resource centres, libraries, churches
  • the human resources department at work
  • friends, neighbours, relatives, co-workers

Making the First Contact

A telephone call will likely be your first contact with the child care centres, agencies or nursery programs on your list. When you call, ask to speak to the director or supervisor since you may be arranging for care with that person. If the director or supervisor is not available, ask about a convenient time to call again.

Before telephoning child care centres or nursery programs, it is a good idea to make a list of questions. If you use the same list for each call you can compare the answers from each option and eliminate child care centres that clearly do not meet your family’s needs.

Your questions may include:

  • What are your hours?
  • What are the ages of children for which you provide care?
  • How many children are in a group?
  • How many staff members care for each group?
  • What training does the staff have?
  • Are parents encouraged to drop in?
  • What is the cost? Are there any additional charges? Is there a charge when children are sick or away on holiday?
  • Is there an application fee?
  • Is fee subsidy available?
  • Do you operate all year or have any set closure times?
  • Do you have a waiting list?
  • What is your policy or guidelines for including children with special needs?
  • Do you have supports or resources for children with special needs?

If you like the way the director or supervisor answers your questions, ask for an appointment to visit the centre. Since it is important to be able to compare two or more centres, continue to call the other centres on your list. Ask the same questions and make appointments to visit.

If you are interested in home child care, find an agency that provides this service and ask to speak with or meet the director and/or home visitor who will be supervising the home child care provider. It is a good idea to make a list of questions. If you use the same list for each, call so you can compare the answers from each option and eliminate agencies that clearly do not meet your family’s needs.

Your questions may include:

  • How are home providers selected?
  • Can I visit the provider’s home? Can I visit more than one provider?
  • Are there training opportunities the agency offers to the providers?
  • How often do home visitors see the providers?
  • How does the agency communicate with parents and how do providers give parents information about their children?
  • What is the cost? Are there any additional charges? Is there a charge when children are sick or away on holiday? Is there an application fee?
  • Is fee subsidy available?
  • Do you operate all year or have any set closure times?
  • Do you have a waiting list?
  • What is your policy or guidelines for including children with special needs?
  • Do you have supports or resources for children with special needs?

Visiting the Program

When visiting child care centres, nursery programs, or home providers, it is important to think about the way you were welcomed and how your questions were answered. Spend time talking with the staff who will be working with your child and be sure to observe the program for long enough to get a clear impression. Make notes during the interview and/or use the checklist found at the end of this document – one for visiting child care centres and nursery programs, and another for visiting home child care providers.

As a parent you want to make sure that your child receives the best possible care with lots of love and understanding. After your visits, compare your notes and think about the agency, the home(s), child care centres, or nursery programs you have seen in relation to your family’s child care needs.

Child Care Centre/Nursery Program Visit Checklist

Take this checklist with you when visiting child care centres or nursery programs, and consider the following elements of quality child care. During and/or following your visit to the program, review each section. With a checkmark, indicate if what you observed during your visit is appropriate for your child and family.

Child’s Communication Binder

photo of communication binder

A communication binder can mean different things. In this guide, you as a parent, teacher or early childhood professional, will learn how to create a simple yet powerful tool that your child can use to communicate with other children and people in their life.

A communication binder has pictures arranged in a variety of categories. When choosing pictures, consider your child’s needs and what she is not able to clearly communicate through speech or gestures. Routines and rules can be added for different settings.

Why use a Communication Binder?

Children with special needs sometimes find it hard to be understood when they are in a busy classroom, or meeting someone for the first time. Reasons for this may include:

  • unclear speech
  • limited vocabulary
  • difficulty making eye contact
  • forgetting what to say or do when feeling overwhelmed

A child who uses a communication binder is more able to express herself in a way that other children and adults will understand. This may decrease the likelihood that she will resort to crying, hitting, kicking, or having tantrums in an attempt to get her needs met.

A communication binder can also encourage a child to play with and talk to other children without needing an adult to “speak” on her behalf. For example, a child can use her communication binder to show a friend what game she would like to play at recess. Some children have sections on hobbies, such as collecting stickers or baseball cards. Finally, a communication binder can promote sharing and conversation about what a child has done at home, child care, or school each day.

If your child has a speech-language pathologist or support person from an agency, he may provide suggestions about what to include in the communication binder and how to encourage your child to use it.

What to include in a Communication Binder

We have provided a sample communication binder to get you started. The communication binder is based on a series of labeled picture symbols that are easily understood by children and adults.

Below is a brief description of each possible section and ideas about what to include:

Basic Needs

Placing pictures of basic needs at the front of the binder will make it easier for your child to communicate in a hurry. This section usually includes pictures of requests such as “eat”, “drink”, “washroom”, “more”, and other specific needs for which your child requires help communicating clearly.

In My Classroom

Pictures in this section include classroom activities and routines. Since the binder is a support to your child’s expressive communication, the pictures should include activities that she may request, as well as transitions for which she may need help. When your child starts school or child care, her teacher may want to add more pictures.

Let’s Play

Your child can use these pictures when she is playing with others, or participating in group activities. These pictures can assist your child with some social skills, such as asking to play, or knowing whose turn it is. Game and activity choices can also be included to allow your child to point out with what she wants to play.

Show and Tell

You may want to add a photograph or picture to the binder every week for your child to share with friends and family. This encourages conversation about something new, or of special interest, to your child and can help her develop social connections.

What I Did at Child Care or School

This is a conversation page that can be photocopied and completed by your child each day. It can help your child remember what she has done throughout the day so that she can ”talk” about it at home. The conversation page can be laminated and marked with a dry-erase pen.

What I Did at Home

This is a conversation page that can be photocopied and completed by you and your child each evening. It can encourage her to share experiences with teachers and classmates. This page can also be laminated and marked with a dry-erase pen.

How to Make a Communication Binder

You will need:

  • a computer and printer
  • a thin three-ring binder
  • 10 three-hole clear page protectors
  • 5 three-hole page dividers
  • markers and pencil crayons
  • stickers and stick-on labels
  • glue or tape

Steps:

  1. Print the pages for the communication binder found at the end of this document.
  2. Decorate the cover with your child. You may want to glue her picture on the cover.
  3. Place each page inside a page protector and add to the binder.
  4. Put page dividers between sections.

Your child’s communication binder is ready to use.

Personalizing Your Child’s Communication Binder

Communication binders are designed to grow with the person using them. The key to increasing your child’s communication skills at home and in the community is to be flexible and creative.

If the picture symbols in our communication binder do not suit your child’s needs, feel free to create your own using computer clip art, your own drawings, photographs, pictures from magazines, or by visiting the Visuals Engine. Just make sure that the pictures are clear and easy for your child to see. Print or type a label in lower case letters above each picture you add to the binder. It will be easier for your child to learn what each picture represents when everyone uses the same words to describe it.

If you find that a binder is too large for your child to handle or carry around try placing pictures in a mini photo album, or glue them into a paper notebook.

If your child consistently uses words or gestures to express certain needs and wants, the pictures representing them can be removed from the binder. Pictures representing words or gestures that are new to your child can be added instead.

Teaching Your Child How to Use a Communication Binder

Children who are comfortable using the Picture Exchange Communication System (PECS) or visual schedules will probably find it easy to use a communication binder. When introducing the communication binder to your child, it is best to review the pictures in each section with her at the time that they will be used. This way you can make sure that she understands the meaning of each picture. Here are some tips on introducing your child to a communication binder:

Read a Book Together

This will help your child learn that pictures and words can be used to represent
people, objects, or actions. It also provides her with opportunities to practice
page turning and pointing skills. Help your child point to different pictures or objects in the book (e.g., ”Barbara, show me dog”, or, “Barbara, where’s the cat?”). Provide your child with gentle hand-over-hand assistance if needed.

Include the Communication Binder in Daily Routines

When going through daily routines open the communication binder and point to the related picture(s). Start by guiding your child’s hand to a picture and labeling it. For example, “It’s snack time.”

Include the Communication Binder in Daily Conversations

If you are having difficulty understanding your child when she is trying to tell you something, point to the binder and say, “Show me”, or, “Use your pictures”. When friends or family visit, you can encourage your child to show them the pictures that she has put in the “Show-and-Tell” section.

Make the Binder Useful to Your Child

Remember to include pictures of important, desired objects and activities. Reinforce your child’s use of the binder by providing the items requested whenever possible.

Your child is ready to use a communication binder independently when she:

  1. knows what the pictures in the binder mean.
  2. is able to open the binder and turn its pages.
  3. understands when she needs to use the binder.
  4. can get someone’s attention and show them the binder.

Basic Needs 1

Basic Needs 2

In My Classroom

Let's Play 1

Let's Play 2

Show and Tell Blank

What I Did at School 1

What I Did at School 2

What I Did at School 3

What I Did at Daycare 1

What I Did at Daycare 2

What I Did at Daycare 3

What I Did at Home 1

What I Did at Home Blank