Token systems are part of our everyday lives. One example is how we work for money which has no value until we later use it to buy items or activities that are valuable to us. Just like we are motivated to earn money, children often need something to motivate them. As a parent, teacher of early childhood professional you can use a token economy system to encourage positive behaviour and help your child build skills.
When using a token economy system with your child, he can earn tokens for showing positive or appropriate behaviours, or for completing specific tasks. Once your child has collected a set number of tokens, he turns them in to get an item or activity that he really enjoys. For example, every time Marcus remembers to clean up his toys, he earns a token. After earning 5 tokens he gets to play on the computer for 10 minutes.
How does a Token Economy System help?
A Token Economy System can:
- Help your child learn to wait for rewards by providing a visual reminder of how much more he needs to accomplish before getting a favourite item or activity.
- Help your child become more aware of time by showing how long he has been at a task and how much longer he needs to “work”.
- Help motivate your child to be successful in many tasks because it eventually leads to a greater reward.
How do I use a token system?
Here are a few tips to help you get started.
- Selecting the behaviour(s) to be rewarded. Let your child know what behaviours you want to see. Say them in a positive manner (e.g., “Hands in lap” rather than “No hitting”, or “Put toys in the basket” instead of “Don’t leave the toys on the floor”).
- Decide how you will measure the behaviours. Some behaviours will be measured by the number of minutes your child shows the desired behaviour (e.g., sitting quietly for 1 minute) or the number of times your child shows appropriate behaviour (e.g., tidying up his toys after playing).
- Decide where and when to monitor the behaviours. For example, you might decide to use this token system only at home, in the classroom, during lunch, or at bedtime. You can also use a token system at a time that is convenient for you, or at a challenging time for your child.
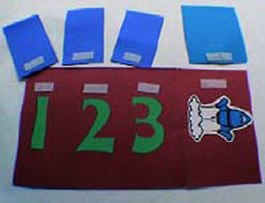
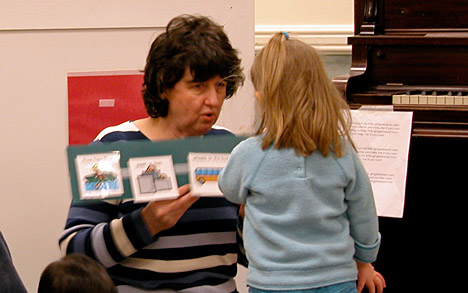
- Select your tokens. You can use lots of different things as tokens including stickers, coloured dots, pennies, or even checkmarks. You can also use a picture of the targeted behaviour as a reminder of what your child has done to earn a token (see below for an example).Keep in mind that tokens should be portable (easy to carry), and durable. They must be easy to give to your child and convenient to keep. You may wish to put tape or Velcro on the tokens so they can be secured to a token board and used over and over again.
- Select your reinforcers or rewards. Whenever possible, get your child to help you choose a reward. You might also set out possible reinforcers (e.g., a video, a favourite storybook, a computer game, a puzzle) and see which ones he selects most often. Remember to use reinforcers that are appropriate for your child’s age and the setting the token economy will be used. Try to add new ones every now and then.
- Decide on the value of the reward. How many tokens must your child earn before he receives the reward? Remember that this can change over time. At the beginning, it should be fairly easy to earn the reward and your child may have to earn only 2 tokens. Later, he may need to earn more tokens to receive the same reward.
- Start your program. Have the tokens and token board ready to show to your child as you explain the program to him. Use simple language to remind your child of the expectations for earning tokens each time you use it.
- Deliver the tokens consistently. Give the tokens to your child as soon as you see the desired behaviour. Remember to praise your child when he receives the token. “Good sitting!” or “Nice washing your hands!” will remind your child why he is getting the token.
- Review and adjust your token economy system. Eventually, you will want to fade your child off the token system. Once you notice a significant improvement in your child’s behaviour, you can try to extend the time and amount of work required to earn tokens. Be careful not to do this too quickly or the positive behaviours may stop.
How does a token economy system look?
Token economy systems can be in a variety of forms. If this is your first time developing a token system, you will want to keep things simple. You’ll find some basic templates in the Visuals Engine of Learning Together.
Let’s take a look at an example:
Malcolm gets a sticker on his token board every time he puts his dishes in the sink after eating.
When he has 3 stickers he gets to play on the computer for 20 minutes.
NOTE: Some token systems consist of removing or “taking away” tokens for inappropriate behaviour. Taking away tokens can cause your child to lose his trust of the system. Keep in mind that you’ve put a lot of work into creating a token economy system and teaching your child how it works. We recommend that for young preschool children you focus on giving your child tokens for the behaviour you want to see and use other strategies to let your child know that inappropriate behaviour will not result in getting your attention.
Here’s another example:
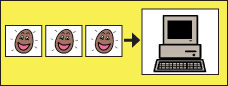
Ms. Zemenek is trying to encourage Marika to speak quietly when in the library. Every time Marika uses a quiet voice, she earns a token. In this case, the tokens are pictures of ”talking quietly”. After earning tokens, Marika gets to read her favourite book, The Very Hungry Caterpillar.
Using a token economy system is an excellent way to promote positive behaviour, self-esteem and have your child work towards something special. It’s also a great way to remind yourself of the goal you and your child are working towards.
Here’s another example:
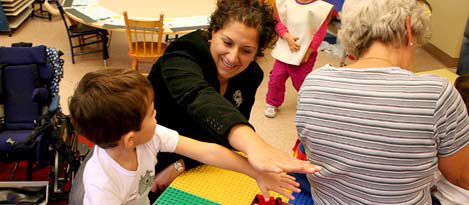
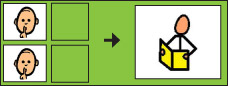
William is easily distracted. He often starts playing with things but ends up staring off into space or wandering away. His teacher wants him to learn to keep himself involved in purposeful play activities, and finish what he is doing before moving on to another activity.
We’ll establish a goal for William to complete a short series of six activities during free play time. We will reward him with a token every time he completes an activity. Initially, we’ll select activities with clearly defined endings, such as puzzles, building a block tower using 10 blocks, etc.
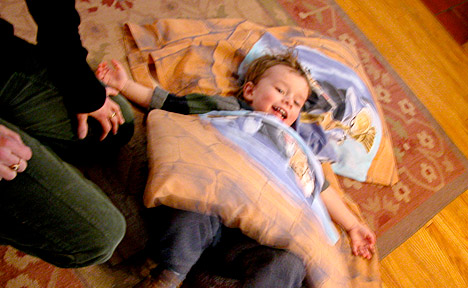
We’ll start with a token board that only requires a single response before the reward is delivered. As William becomes familiar with the token system, we’ll move to two response, and so on, until he gets to six responses before earning the reward. Each day before free play time, we’ll remind William that he’ll be earning tokens for each completed activity. We’ll show him how many he needs to earn. We’ll also review his choice of reinforcers and help him to select his reward. The picture of the reward will be placed in the end space of the board and will be visible to William throughout free playtime. This will continually remind him of what he’s working towards. In case, William is working to earn a tickle.
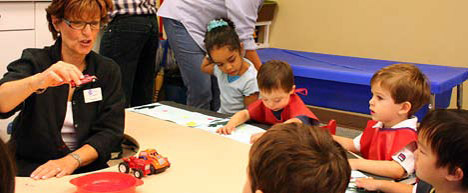
Tips for the Classroom:
Token economy systems are great to use in classrooms because they can be geared to a specific child, or to groups of children. The children may be working on improving the same behaviours or have completely different behaviours that will be reinforced. Token systems are most effective at maintaining positive behaviours when they are specifically designed for a child or group of children, address specific targeted behaviours, and are clearly communicated. The expectations and rules must be communicated and understood.